Friday, April 29, 2011

Pumpkin Chocolate Chip Cookies

Today, in the middle of summer, I wanted cookies. Shocking, I know. And, what do you know, I had some pumpkin left over from last night's dumplings.
So cookies there would be.

These upcoming cookies make me miss my roommates all the more. We used to buy these cookies every single time we saw them at Kroger because they rarely had the chocolate chip ones. Our household might have single handedly kept them stocking the things. Well, the homemade version is much better and I wish I could share them with my lovely roomies.

Pumpkin Chocolate Chip Cookies
Ingredients:
1 cup flour
3/4 tsp baking powder
1/2 tsp baking soda
1/2 tsp cinnamon
1/4 tsp pumpkin pie spice (LOVE this stuff)
1/4 cup brown sugar
1/4 cup white sugar
1 egg
1/2 cup pumpkin
1/2 tsp vanilla
1/2 cup chocolate chips

Directions: Preheat oven to 325 degrees.
Mix together all ingredients. Place by the spoonful onto a greased baking sheet.
 Bake for 7 minutes, rotate cookie sheet, and bake for 3-5 more minutes, depending. They are done when the edges begin to brown and a toothpick comes out clean.

 These are wonderful. They are slightly cakey while still holding on to some gooey cookiness. The chocolate comes through but you still get that full spicy pumpkin flavor. A keeper in my book.


Tuesday, April 26, 2011

Easy Grilled Asparagus

Ready for the easiest recipe ever?


A sweet tooth is not required for this treat. Nor is an oven. Just heat up the grill, grab an old pan, and you are already almost done with this simple yet delicious dish.

When you need to balance out your overconsumption of large quantities of cookies/cake/ice cream, it is time to make this healthy vegetable. It might just be as satisfying as any brownie.

Grilled Asparagus
Very short list of ingredients: 
Asparagus, washed and trimmed
olive oil
salt
pepper
seasoning salt
Goat cheese, if preferred


Directions: Heat grill to medium high. Rinse and trim the ends of the asparagus. Pour some olive oil on a pan and arrange the asparagus on the pan. Sprinkle liberally with salt, pepper, and seasoning salt. Roll asparagus on pan to cover ever surface.
Place pan on grill and cook until the asparagus is done. It will be slightly crunchy and will have that delicious grill flavor on them. I can't give you a specific time limit or say when you'll know... I just periodically taste them to see when they are perfect. Don't overcook though... there are few things worse, or more sad, than mushy overcooked asparagus. What a shame.

For even better results, top with hunks of goat cheese right after you take these off the grill. The flavor is amazing.

Strawberry Chocolate Pie, for Spring

It's spring! It's sunny and warm and breezy and lovely. Who cares if there are storms and rain everyday in the forecast for the next 3 weeks? Today it is spring! Today is a good day for a strawberry pie to get us in the mood for upcoming warm weather, sans rain please. Even better, a strawberry pie with chocolate.


Strawberry Chocolate Pie

Ingredients:
1 pie crust
3 ounces German Sweet Chocolate
2 packages cream cheese (8 oz each), softened
3 TB heavy whipping cream
2 tsp vanilla extract
1-3/4 cup powdered sugar
2-1/2 cup fresh strawberries, sliced
1/4 cup jam, I used homemade strawberry

Directions:
Press pie crust onto an ungreased pie pan. Bake at 450 degrees for 10-12 minutes or until golden brown. Cool. Spread melted chocolate over bottom of crust. Refrigerate for about 10 minutes or until almost set. Meanwhile, beat the cream cheese, cream, powdered sugar and vanilla until smooth. Spread over chocolate layer.


Almost too pretty to eat. Almost.

Arrange strawberries over filling, then brush with the jam. Cover and refrigerate before serving. This pie is an twist on a classic. A bite of this tastes like a chocolate covered strawberry, or better.

Monday, April 25, 2011

Bittersweet Chocolate Almond Torte

Happy Easter! (Belatedly). I hope everyone got to sing a few hymns and got plenty of chocolate in their Easter baskets this year.


This year I was a little over-ambitious. I had plans to make lots of elaborate desserts to impress my family, who have been effectively conditioned into dessert snobs by my mom and aunts, and my boyfriend's family, with whom I was spending my first Easter, gulp. I wanted to impress.

Well, I need to work on my time management... what with work, a rare social life, and church looming early in the morning, I didn't quite find time to bake as extravagantly as I would have liked. Alas, no towering carrot cake, no tiered chocolate torte, no piped rose petals in the icing.

However, I did manage to find time to make a simple chocolate almond torte, even if that time was hurried and hectic and at 7:30 a.m. Luckily,  this torte is a pretty simple and fun process, plus I got to eat chocolate for breakfast (so what, it's Easter!). The result is pretty impressive, if I do say so myself.

Bittersweet Chocolate Almond Torte  inspired by Country Living's, chocolate-almond torte

Ingredients:
2 sticks plus 2 TB unsalted butter, cut into pieces. Use some more to butter the pan.
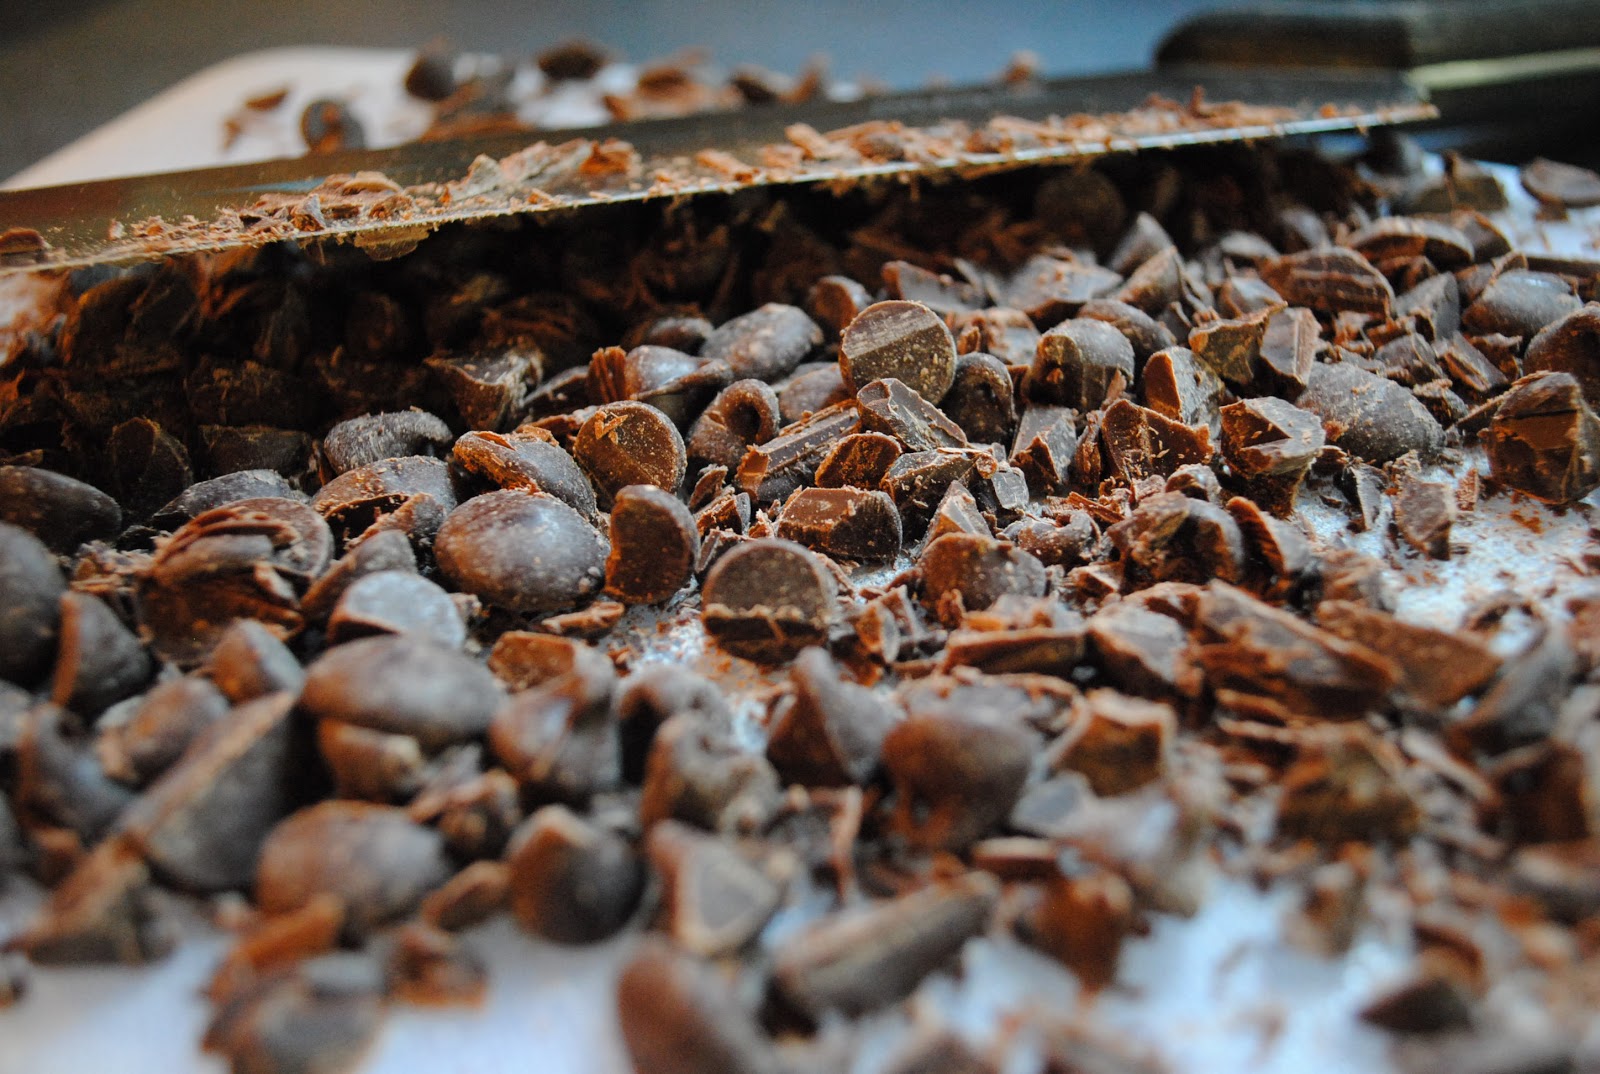
9 ounces good dark chocolate (I used bittersweet)
6 large eggs, separated
2/3 cup sugar
1/2 cup almonds, finely chopped
1/4 cup slivered almonds, toasted, for garnish
1 TB hot fudge, for garnish

Directions:
Preheat oven to 350 degrees. Lightly grease a 10-inch springform cake pan. You can use a regular cake pan, but this makes it ten times easier to get the cake out without deforming it.
Melt together butter and chocolate in a heatproof bowl over a pan of simmering water. Stir until combined. Set aside to cool.

Mmm chocolate. Very hot chocolate


In a large bowl, whisk egg yolks with sugar until pale and fluffy. Pour melted chocolate mixture into the egg mixture, stirring constantly. Fold in almonds.

In a separate bowl, using an electric mixer set on medium-high speed, beat egg whites until stiff peaks form. Fold egg whites into chocolate mixture until just combined. Pour into pan and bake for 35 minutes. The torte will be very moist in the middle, yum. Let cool completely in the pan, about an hour.

 When it cools, toast some slivered almonds on the stove. To toast, heat some butter in a pan, add almonds, voila. Arrange toasted almonds on top of the torte. To make it even more decadent, heat some hot fudge and add a teaspoon a milk and drizzle it over the torte to make it extra pretty.

What could be bad about lots of butter and chocolate mixed together! This is powerful, rich, dense, not very sweet, and delicious. It's not a torte for the faint of heart, I will say that.

Happy Easter!

Friday, April 22, 2011

Morning Baked Oatmeal

This is one of those dreary mornings when I don't want to do anything except drink coffee and read until the morning stretches to afternoon and suddenly it's twelve and I haven't moved. Does that happen to anyone else? Ah, the benefits of semi-unemployment...

And a lazy morning such as this would not be complete without a warm breakfast to fill my lazy belly and lull me into lazing around for even longer. A breakfast that tastes more like dessert than breakfast.

Baked Oatmeal

*recipe makes 4 individual servings, the equivalent of 4 large ramekins. I usually half it.
Ingredients:
3 cups rolled oats
1 cup brown sugar
2 tsp cinnamon
2 tsp baking powder
1 tsp salt
1 cup milk
2 eggs
1/2 cup melted butter
2 tsp vanilla extract

Directions:
Preheat oven to 350 degrees. In a large bowl, mix together all the ingredients. Some people would tell you to get fussy about sifting the dry, beating the eggs, etc, but not me. Throw them all together and it turns out great with very little effort on your part.Divide equally into ramekins and bake for 30 to 35 minutes.


These come out of the oven smelling so good, it's hard too resist the temptation to dig your spoon in immediately and risk a serious tongue burn (I may have done this more than once). If
you can, wait a about five more minutes before eating, however don't wait too long because these are best served warm with a little milk on top. These are also delicious with vanilla ice cream, but I don't condone that before noon.... er.... right.

Enjoy!

Thursday, April 21, 2011

Chocolate Chip Cream Scones

I sometimes want to be British. There I said it.


Not only do they have amazing, sophisticated, intelligent-sounding accents and live in a land that produced Shakespeare, the Beatles, and my best friend Harry Potter, but they also have an entire time of the day set aside for tea. A specially designated hour to meet friends or family and unwind over a warm drink.


Personally, I'm obsessed with Chai tea. Not very British, but hey.

Daisy likes teatime too.


Not to mention rolling hills and green grasslands filled with castles that house princesses and wizards. Okay, so maybe my vision of the British is a little romanticized. But still, I want a teatime. So today I decided to be British and have a cuppa.


And of course with tea, you need scones.

Chocolate Chip Cream Scones
Ingredients:
2 cups flour
1/4 cup sugar
2-1/2 tsp baking powder
1/2 tsp salt
1/2 cup - 1 cup semi-sweet chocolate chips, roughly chopped
1-1/4 cup heave cream or whipping cream

Glaze:
2 TB heavy cream or whipping cream
1/2 tsp vanilla extract


Directions:
Preheat oven to 425 degrees.
In a large bowl, combine flour, sugar, baking powder, and salt. Mix well with a whisk. Stir in the chopped chocolate. Make a hole in the center of the dry ingredients and pour in the cream.

Scrape the dry ingredients off the sides of the bowl and into the cream, blending the mixture until dry ingredients have been moistened. Don't over mix or your scones won't be fluffy. The dough will be rough. Gather the dough together into a ball.


On a lightly floured surface, flatten the dough with your hand until it is 3/4 inch thick. Be sure to flour your hands and do not even try to use a rolling pin, it won't end well for you or the pin. Use a 2 inch round cookie cutter to cut the dough into rounds (or whatever shape you prefer). Arrange the rounds on a greased baking sheet. Brush the tops with the glaze and bake until golden brown, 12-15 minutes.

These are delicious with a little butter and strawberry jam
And out pops perfectly beautiful scones, fluffy and fabulous. These ones aren't very sweet and are very light and airy, just like a British scone should be apparently (these aren't like Starbucks scones, which are the more Americanized cookie-like version, although still delicious). This recipe is also pretty guilt free (no butter or oil!) unlike a lot of the stuff I make. A perfect midday snack that feels right out of the pages of Pride and Prejudice, or so I imagine.

Monday, April 18, 2011

Dark Chocolate Crinkle Cookies


Today I received an urgent call for cookies. My aunt was going to be in town and demanded coffee and treats. So I had to break out the cocoa powder.


This call came just in time. I was having a tense morning filled with scary emails and phone calls. Okay not scary, but intimidating. Important. Potentially life-changing. So yes, scary is the right word.

And baking is always a good cure for anything scary. Especially when it involves dark chocolate. And the chance to have it ooze between your fingers. And lick it off a spoon. As usually happens when I make these cookies.


Dark Chocolate Crinkle Cookies

Ingredients:
  • 1/2 cup oil (this time I used half canola oil, half extra light olive oil)
  • 6 TB unsweetened cocoa powder
  • 6 TB special dark cocoa powder
  • 4 more TB oil
(You could use 4 ounces of unsweetened baking chocolate for the 4 TB oil and 12 TB cocoa. I was out, hence the cocoa powder/oil approach)
  • 2 cups granulated sugar
  • 2 tsp. vanilla
  • 4 eggs
  • 1/2 tsp. salt
  • 2 tsp. baking powder
  • 2 cups flour
  • 1 cup powdered sugar, to roll cookies in

Directions: Mix oil, chocolate, sugar, eggs and vanilla until well blended. Stir in dry ingredients. Chill several hours or overnight. This is not completely necessary, it simply makes the dough easier to deal with. If you don't mind a little stickiness, feel free to bake them immediately. Roll dough into balls (a little smaller than ping pong balls) and drop into the powdered sugar and roll until they are covered. Bake at 350 degrees for 8 minutes.


Unfortunately, nothing too life changing came out of those scary phone calls this morning. However, these cookies are pretty life changing all by themselves.

Sunday, April 17, 2011

Oatmeal Pancakes

*Recipe serves two hungry people
Ever have a hankering for pancakes? Well, it happens to me quite often, and rather randomly. At six o'clock on a Sunday, for instance. Pancakes aren't just for breakfast, I always say. Or, at least I say that after eating these.

Oatmeal Pancakes
Ingredients:
2 cups rolled oats
2 cups milk
2 eggs, lightly beaten
4 TB unsalted butter, melted
1 cup flour
1 TB brown sugar
1 TB white sugar
1 tsp. baking powder
1 tsp. baking soda
1/2 tsp. cinnamon
1/8 tsp. salt
1 tsp. vanilla

Directions:
An hour or two before you begin, soak the oats in a bowl of milk and store in the fridge.

This helps to soften the oats a little and give them a nice pancakey texture.

You can do this overnight if you are planning on having these pancakes in the morning.

When you are ready to make the pancakes, combine oat and milk mixture with the eggs, butter and vanilla. Next stir in the rest of the dry ingredients.

Preheat a griddle to medium-low, around 250 degrees. You don't want the pan to get too hot because these robust pancakes are so much thicker than normal ones. In order to cook them through and avoid a raw center, they have to be on the griddle for a bit longer and at a lower heat. This is to avoid burning the pancake's outside as they cook through. 

I'll admit it, I have a few weaknesses when it comes to pancakes: 1) I can never decide which one of my too many aprons to wear while being a master flipper, 2) I like to eat the batter. Call me crazy, and 3) I'm a very hasty pancake flipper. Patience is not my virtue. And hastiness is a fatal flaw with these pancakes. So I had to cool my jets. 

I added chocolate chips, I couldn't resist! Flip when you see bubbles.


Do not flip too early or they will be runny on the inside, not good for these pancakes.
They should be a nice golden brown on each side and solid in the middle.

Let the pancakes cook for about 5 minutes on each side. They need to cook through, and this takes a bit of time. Serve with bananas and warm maple syrup!

Chocolate chips made these almost cookie-like, for those with a sweet tooth. Nuts, raisins or bananas would also be delicious!

Saturday, April 16, 2011

Brown Sugar Molasses Cookies

It's a chilly rainy spring day and I'm just dying for  a big cookie. One that makes me feel warm and fuzzy inside. This calls for something filled with warm spices and a gooey center. A cookie that is an excellent excuse to brew a fresh pot of coffee.

This is a day for Molasses Cookies.


Today I don't want just any molasses cookie. No, not those big hard molasses cookies that threaten to break a tooth if you happen to bite too enthusiastically. These are CHEWY molasses cookies with a tiny bit of snap. The trick to making them chewy, not hard and tough, is a combination of brown sugar, butter and the correct baking time. Let me explain.

The brown sugar, the molasses and the butter combine to keep the cookie moist and delicious, even after the first day. The other trick to this cookie is to bake them no longer than 8 minutes. An overcooked cookie is not a happy cookie.

Brown Sugar Molasses Cookies:

Ingredients:
3/4 cup butter
1 egg
1/2 cup brown sugar
1/2 cup granulated sugar
1/4 cup molasses
1/2 tsp. salt
1 tsp. ginger
1 tsp. cinnamon
1 tsp. baking soda
2 cups flour

Directions:
Beat together butter, sugars, egg and molasses in a large bowl. Add in dry ingreients witha wooden spoon. Roll into balls and roll each in sugar.


Bake at 375 degrees for no longer than 8 minutes until they begin to crackle on top.


These are really easy to whip up quickly and eat over coffee and the paper.  Comfort Cookies.

Your dog will think so too. Share! How can you resist that face?

Monday, April 11, 2011

Butter Glazed Blueberry Cornbread Muffins


I'm a cornmeal lover. That fantastic corny, gritty, nutty, dense flavorfulness can be used for much more than just cornbread. My favorite way to use cornmeal has always been in the pancakes my family lovingly calls "cornies". We whip up these corn cakes for birthday breakfasts, late Saturday mornings and pancake dinner nights, making sure to sufficiently douse each cake in loads of butter and maple syrup.

Since I love cornmeal so much, it's high time I figured out more delicious ways to use it. In a not-so-breakfasty twist, I decided to translate the corny into a more sophisticated, grown up version of itself. A corn muffin sprinkled with blueberries and infused with browned butter, with a browned sugar, butter and honey glaze.


Upgrade. This muffin is literally dripping with goodness.

Give yourself an ample amount of time to make these; unlike the corny, these muffins take over an hour of hands-on preparation because of the browned butter. It takes awhile, but remember, it's a labor of love. If you're like me, you'll read your book while standing semi-watchfully beside the oven inhaling the aroma of the slowly browning butter. Not altogether a bad thing.

Butter Glazed Blueberry Cornbread Muffins

Before you even begin assembling the other ingredients, start with the butter. This was my first time making browned butter, and the time it took surprised me. The browning process is the time-consuming part of this recipe.

 Butter browning instructions: Melt 8 TBSP (a whole stick) of butter over medium low heat. A small skillet works best for this. Then you wait. Yep, you don't have to lift a finger. Just let the butter brown itself in the skillet. It will foam and bubble, then begin to separate and clarify. It is sufficiently browned when it is a nut brown color and smells amazing. I like mine to have some brown flecks of the browner, carmelized butter.

Mmmm. Butter.

The bubbly sputtering stage

Beginning to brown

Almost there: the clear butter is a nice brown color

Directions:

In a large bowl, whisk together:
1 cup cornmeal
2 cups all-purpose flour
1 and 1/2 tsp. baking powder
1 tsp. baking soda
1/2 tsp. salt

In a separate bowl, whisk together:
2/3 cup brown sugar
1/2 cup milk
2 eggs
3/4 cup sour cream

* Whisk in the browned butter to the wet ingredients. Pour the wet ingredients into the dry and stir in. Divide the batter evenly into greased muffin tins. Bake for about 20 minutes in a 400 degree oven. Remove from oven and from muffin tins. While they are still hot, apply the glaze.

Glaze:
 1/8 cup brown sugar
1/4 cup honey
1 tsp. maple syrup
2 TBSP butter

In the same skillet as before, melt the butter, honey, syrup and brown sugar over medium-low heat, using the same browning process as before. This will happen a lot more quickly because of the additional ingredients and smaller amount. When the glaze becomes bubbly, then begins to clear, remove from heat. The glaze will have a caramel texture and will be a pretty golden brown. Brush or spoon generously over muffins.

The syrupy buttery taste of the corn pancake, all grown-up.

Thursday, April 7, 2011

Country Loaf


"Good bread is the most fundamentally satisfying of all foods; good bread with fresh butter, the greatest of feasts!"  - from legendary James Beard


I couldn’t agree more. There isn’t anything better than a big hunk of bread, fresh and warm right out of the oven with a slab of butter on top. I could literally eat it for every meal of the day, every day of my life, and not complain one bit. Low-carb diet, get a life. You are not for me.

I’ve only recently begun trying my hand at baking bread, which is almost a sin considering how much I love to eat it. For some reason it has always seemed so intimidating with all its insistent demands: Mixing, scraping, kneading, standing, sifting, rising, shaping, the list goes on and on! Not only does it require many steps, but the recipes always vaguely and mysteriously tell you to stop mixing/kneading/whatever when the dough reaches the “right” consistency. Like magic. How am I supposed to know when that is, exactly? I figured any attempt would be a disaster unless I meticulously followed the directions to the letter. Or something would probably explode. Disastrously.

But really, bread making is not as hard as it looks or sounds. Once you get into, get yourself covered in flour and dough and really get into it, bread making actually comes quite naturally. You start to feel it.


The Country Loaf is a nice bread to start with. It’s a process, but worth it. The recipe I used is right out of the Betty Crocker Cookbook. 

Country Loaf
Ingredients: 5 to 5 ½ cups bread flour
1 tsp. sugar
1 package regular or quick active dry yeast (2 ¼ tsp.)
2 cups very warm water (120 to 130 degrees)
2 TBSP olive oil
2 tsp. salt
1 TBSP cornmeal
plastic wrap

*Make sure you use bread flour. Bread flour has a higher amount of gluten that all-purpose flour, and in bread gluten acts as the glue that holds all those good grains together and traps the gas released by the yeast. To put it simply, it just makes the taste and texture of the bread extra good!

Directions:

  1. Mix 2 cups of the flour, the sugar and yeast in large bowl. Add the warm water. Beat with mixer on low speed for 1 minute, scraping bowl often. Cover tightly with plastic wrap and let stand for about an hour, until bubbly.
  2. Stir in oil and salt. Stir in some of the remaining flour, ½ cups at a time, until a soft, smooth dough forms. You’ll know. Place the dough on a lightly floured surface. Knead for about 10 minutes (Don’t skimp!). Add flour as you need it to keep the dough from sticking. You are done when the dough is smooth and springy.
  3. Grease a large bowl and place the dough in it. Turn the dough to grease all side. Cover bowl loosely with the plastic wrap and let it rise in a warm place for about an hour or until it doubles in size. Dour is ready if you touch it and your finger mark remains.
  4. Grease a cookie sheet. Place dough onto a floured surface and gently shape into a round ball. Try not to release all the bubbles in the dough. Stretch sides of dough downward to make a smooth top. Place on cookie sheet with smooth side up. Spray the loaf with cool water, cover again loosely, and let rise in a warm place 45 to 60 minutes, until almost double.
  5. Place a square pan on the bottom rack of the oven. Fill with hot water until ½ from top. Heat oven to 425 degrees.
  6. Spray loaf with cool water; Betty Crocker says to sprinkle lightly with flour, but I use a little corn meal to give this bread a nice crunch. Carefully cut three ¼ inch deep slashes on top of loaf with a sharp serrated knife.
  7. Bake 35 to 40 minutes or until loaf is a deep golden brown with crisp crust and sounds hollow when taped. Let cool on a rack.

 Best served warm and with real butter! Enjoy!

    Tuesday, April 5, 2011

    Maple Nut Granola


    Oh Ohio. Cold, cloudy, wet, snowy Ohio. It's April. Don’t you know this means Spring? On days like this, as I sit at my computer gazing longingly at the sky, hoping for some sun and some diversion from the monotony of resume submissions and the never-ending grayness, the kitchen calls. What better way to brighten the day than something sweet. Something crunchy. Something that will sustain you through this gray day and the inevitable gray days to come. That something, my friends, is granola.

    Maple Nut Granola to be exact. It’s easy, quick, and oh so delicious.
    The star of this granola: Homemade Maple Syrup!
    Maple Nut Granola
    Ingredients:
    3 cups Rolled Oats
    2 cups nuts of your choice (my favorite combo is 1 cup sliced almonds, ½ cup crushed walnuts, ½ cup crushed pecans)
    ¼ cup + 2 TBP real maple syrup (none of that cloyingly thick fake stuff here)
    ¼ cup canola oil
    ¾ tsp. salt
    1 cup raisins


    Directions:
     
    Preheat oven to 250 degrees. In a large bowl, combine oats, nuts and brown sugar. In a separate bowl, combine maple syrup, oil and salt. Pour the syrup mixture onto the oats mixture and stir.


    Pour and spread onto baking sheet.

    Caution: delicious aroma will cause mouth to water.

    Bake for 1 hour and 15 minutes, stirring every 15 minutes.
    Remove from oven and add raisins. 

     Bon Appetit! This is a great snack to munch on by itself, or throw it on top of some greek yogurt or vanilla bean ice cream for a richer treat!

    Monday, April 4, 2011

    Chocolate Chip Cookies


     For my very first post, I want to make the very first recipe I ever baked.

    I will make that time-honored standby, beloved by sticky-fingered kids, sweet-toothed adults, my dough-dipping boyfriend, and every other human (or animal for that matter) with the ability to taste, smell, or breathe: chocolate chip cookies.  Over the years, I've tweaked this classic recipe to perfection.

     
    I’ve been known to eat 4 or 5 of these babies at once. 


    The trick to the ultimate chocolate chip cookie is the texture. Some like them crisp and crunchy. Some like them cakey and soft. Personally, I’m of the chewy and gooey persuasion. I believe a cookie should melt in your mouth, and in your hand. A napkin should be necessary. A few hours after eating one, you might find chocolate in the corners of your mouth, on your pants, in your hair, behind your ears. Be forewarned: these aren't cookies for the prim and proper. A delightful mess will ensue.


    Best Chocolate Chip Cookies 

    Ingredients:
    1/2 cup butter
    1/2 cup crisco
    2 large eggs
    3/4 cup granulated sugar
    3/4 cup light brown sugar
    1 tsp. vanilla
    1 tsp. baking soda
    1 tsp. salt
    2-1/2 cups all-purpose flour
    handful old-fashioned oats (adds a hearty heft to the cookie)
    1 cup semi-sweet chocolate chips
    1 cup bitter-sweet chocolate chips (60 % cacao gives the perfect contrast to the sweetness of the rest of the cookie)

    Directions:
    Preheat oven to 375 degrees. Mix together butter, crisco, sugars, eggs, and vanilla. Stir in dry ingredients. Add chocolate chips. 


    Drop by large spoonfuls onto un-greased cookie sheet. Don't be shy.

    Bake for around 8 minutes, till just golden brown and still gooey. Don't overcook! There's nothing worse than a hard chocolate chip cookie. After a minute or two, remove from cookie sheet and place on wax paper or parchment paper to cool.


    If you're like me, you won't be able to resist the still-hot cookie beaming up at you from the paper, just waiting to be devoured. Trust me, its worth the mess!